Prepring for your new lawn
Soil Prep For Beautiful Lawns
- Improved Uniformity
- Increased Density
- Faster recovery from wear
- Reduced Use of water, fertilizer, & chemicals
- Reduced Maintenance
For optimum growth, turfgrass needs just four things (in the proper balance) to grow...sunlight, air, water and nutrients. Reduce any of these, or provide too much of any one, and the grass may die or simply suffer. In the right proportions, the grass will flourish, providing not only beauty to the landscape, but also a clean and safe place to play and many benefits to the environment.
Grass obtains three of these four essential factors (air, water and nutrients) from the soil, but many soils are less than idea for growing grass. Some soils contain too much clay and may be very compacted... great for roads, bad for grass, because air and water aren't available to the roots and the roots can't grow. Other soils may have too much sand... beautiful on a beach, but difficult to grow grass because water and nutrients won't stay in the root zone long enough for the plant to use. Another frequently observed problem with many soils is that its pH (the degree of acidity or alkalinity) is too high or two low for optimum grass growth.
The knowledge of what's necessary, the amount and availability of materials and the immediate costs of time and money are the factors that typically deter people from taking the steps necessary to improving the soil. While some people do not fully understand the importance of good soils for grass, many also believe they can save time and money by ignoring the need to improve their lawn's soil.
The fact is that failing to improve the soil before planting is only inviting a much greater and continual investment of both time and money, that will never return its value as fully as preparing the soil properly before planting any grass.
Follow these steps for a beautiful, healthy and trouble-free lawn:
- Clear the site of all building materials (wood, cement, bricks, etc.), as well as any buried stumps, rocks , stones or other debris that is larger than 4-5 cm (2-3 inches) in diameter.
- Rough grade the entire area to eliminate any drainage problems on the property. This would include sloping the grade away from building foundations, eliminating or reducing severe slopes and
filling low-lying areas. A tractor-mounted blade and/or box are most often used for rough grading, but if the area is smaller, it can be done with hand tools. The rough grading will probably uncover
more debris that should be removed and not buried.
- Initial tilling, to a depth of at least 5 cm (2 inches), should be completed prior to adding any topsoil or soil amendments. This will control most annual weeds, alleviate subsoil compaction and
permit a bonding of the topsoil to the subsoil and improve root penetration and water movement.
- Add topsoil to achieve a total topsoil depth of 10-15 cm (4-6 inches), after firming. The topsoil should be a loamy sand, sandy loam, clay loam, loam, silt loam, sandy clay loam or other soil
suitable for the area. To the extent possible, practical, affordable and available, incorporate humus (fully decomposed organic matter) into the topsoil.
- Test the soil pH with a chemical soil test to determine if any pH correction materials are required. Acidic soils (pH of 6 and below) can be improved with the addition of lime. The type (or
source) and total amount of applied lime will be determined by the level of acidity and should be based on the recommendations of a reliable garden center or turf professional.
Alkaline soils (pH of 7.5 and higher) can be improved with the addition of sulfur or gypsum. As with acidic soil correction materials, the type and total amount of materials will be determined by the level of alkalinity and should be based on professional recommendations.
- Apply "starter fertilizer" that is high in phosphate (P, or the middle number on a bag of fertilizer), at a rate recommended for the particular product. To prevent root injury to newly installed
turfgrass sod, this fertilizer should be worked into the top 7 to 10 cm (3-4 inches).
- Finish grade the entire site, maintaining the rough grading contours and slopes, with a tractor-mounted box blade on large areas or heavy-duty rake on smaller sites.
- Roll the area with a lawn roller one third full of water to firm and settle the surface and reveal any low spots that should be filled to match the surrounding grade surface. If time permits,
allow the area to settle further with rainfall or by applying irrigation water. Although rolling is beneficial it is not a necessity. If you cannot roll make sure your site is compacted enough so
your feet do not sink into the soil anymore than half an inch or so.
Turf Installation
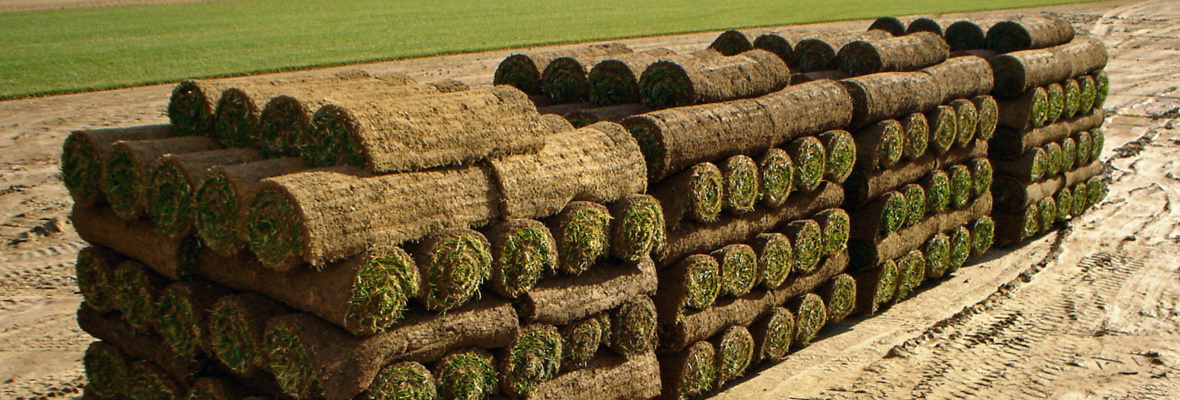
Cultivated turf allows you to enjoy a lawn of instant beauty and maturity without the usual time-consuming hassles of seeding.
STEP 1 - Measuring and Ordering
With a tape, measure the area of your planned lawn. Include these measurements on a sketch of the lawn area, with the length, width, and any unusual features. Your local TPI member will be happy to
assist you in determining the amount of turfgrass sod you will need from your sketch.
Schedule your order for delivery of turf after preparatory work is completed and you are ready to install. Prompt installation on the day of delivery is crucial to a strong beginning for your lawn.
STEP 2 - Soil Preparation
For best result, rototill or spade the area to a depth of 10 to 15 cm. (4 to 6 in.). Eliminate drainage problems by having soil slope away from foundations, etc.
Soil test your lawn area with the assistance of qualified service in your area. Then rake in fertilizer, lime, peat, compost, etc. as need to a depth of 7 to 10 cm. (3 to 4 in.). Rake and smooth the
soil removing rocks, roots, and large clods. Roll the area lightly with a lawn roller 1/3 full of water. This will firm the soil surface and reveal low areas that need more soil. Keep the grade 2 to
3 cm. (1 in.) below sidewalks or driveway.
Water the prepared area to settle soil and provide a moist base for turf. Moistening to a depth of 15 cm. (6 in.) is recommended for most soils. However, consult with your local TPI member regarding
your specific soil needs.
STEP 3 - Turf Installation
Install your lawn immediately upon delivery. Begin watering lawn within 30 minutes of installation. Turf is a living plant that requires ground contact and moisture to survive! In hot
weather, protect unlaid turf by placing stacks in shade, covering with moist burlap sacking, and/or sprinkling.
Begin installing turf along the longest straight line, such as a driveway or sidewalk. Butt and push edges and ends against each other tightly, without stretching. Avoid gaps or overlaps. Stagger
the joints in each row in a brick-like fashion, using a large sharp knife to trim corners, etc. Avoid leaving small strips at outer edges as they will not retain moisture. On slopes, place the turf
pieces acroTo avoid causing indentations or air pockets avoid repeated walking or kneeling on the turf while it is being installed or just after watering.
After installing the turf, roll the entire area to improve turf/soil contact and remove air pockets.
STEP 4 - Watering . Give your new lawn at least 2 to 3 cm. (1 in.) of water within 1/2 hour of installation. Water daily, or more often, keeping turf moist until it is firmly rooted (about
2 weeks). Then less frequent and deeper watering should begin.
Weather conditions will dictate the amount and frequency of watering. Be certain that your new lawn has enough moisture to survive hot, dry, or windy periods. Water areas near building more often
where reflected heat dries the turf.
Caution:
During the first three weeks, avoid heavy or concentrated use of your new lawn. This gives the roots an opportunity to firmly knit with the soil, and insures that the turf will remain
smooth.
Maintenance:
Your new sod lawn increases your property value significantly. With proper care, it will remain a great asset, providing beauty, a clean playing surface, and an improved environment.
Mow often, generally removing no more than 1/3 of the grass height at a mowing. Keep your mower blade sharp. Follow local TPI mowing recommendations for your type of lawn.
Fertilizer and chemical applications will depend on climate, sod type, soil, insects, weed and disease conditions.
For fertilizer and maintenance requirements, consult your local TPI member or an extension agent.
Schedule your order for delivery of turf after preparatory work is completed and you are ready to install. Prompt installation on the day of delivery is crucial to a strong beginning for your lawn.
Turfgrass Producers International • 2 East Main Street • East Dundee, IL 60118
Contact Us Today!
New England Turf, Inc.
600 Waites Corner Rd
West Kingston, Rhode Island 02892
Phone: 800-451-2900
E-mail: info@newenglandturf.com
Special Facebook Promotion
Like us on Facebook and get 10% off your next order.